Check out these tips for customizing your bullet journal monthly spread. Simple and minimal spreads are functional and still look beautiful.

I love creating a bullet journal because it is completely customizable. Once you have all of the beginning pages set up, you are ready to jump into the main section that you will be working in throughout the whole year. This is the section where you will have your months and weeks laid out, and possibly even a daily spread. You could include things like a habit tracker page, a monthly review page, a packing list page if you plan a trip, etc.
Before you begin, you might want to decide whether you want your whole bullet journal to follow the same theme and color pattern, or if you want to change it up with each month. I’ve done it both ways, and it looks great either way. (If you do end up using the same color theme for the entire year, you may want to buy multiple pens in each color in case they run out.) One year I decorated each monthly cover page based on the season or big holidays in that month. The next year I went super minimal, using only one large sticker plus pretty handwriting for the name of the month.
Let’s dive in and see a few examples of how you can customize your bullet journal monthly spread!
Bullet Journal Monthly Spread Cover Page

The cover page is what creates the break from the previous month and shows that you are moving into the next month. You can see two different examples in the picture above. For the month of February, I used one large die cut sticker, and then wrote February out in large letters underneath. (I always recommend doing it in pencil first.) Don’t feel like you have to place everything perfectly centered on the page. Change things up and offset it or print the name of the month going up and down instead of left to right. Let your creativity flow.
If you don’t want the added cost of stickers, simple sketches work great too. For the month of September, I sketched a few leaves and flowers in pencil, used light colored pencils to create some circles in the background, and then traced over in black ink. Super simple but it turned out to be one of my favorite monthly cover pages.
Use the entire page, or only use a small portion. It really is up to you.

Here are two more monthly cover page examples. For August, this is one that I decided to offset the sticker. I could have added more flowers or leaves on the bottom half of the page, but sometimes less is more. Keeping things simple is what I am all about and it saves time.
A way to add a fun twist to your monthly cover page is to make something called a dutch door. In the month of January, notice how I created my design and then cut around the edges. Now you can see a sneak peek of the pages behind. Make sure to do the cutting before you start designing and drawing on the back so you don’t cut anything off.
Bullet Journal Monthly Spread Page
Once you complete the cover page, it’s time to move on to the page where you view the entire month at a glance.
This post contains affiliate links, which means I make a small commission at no extra cost to you. See my full disclosure HERE.
Double Page Bullet Journal Monthly Spread

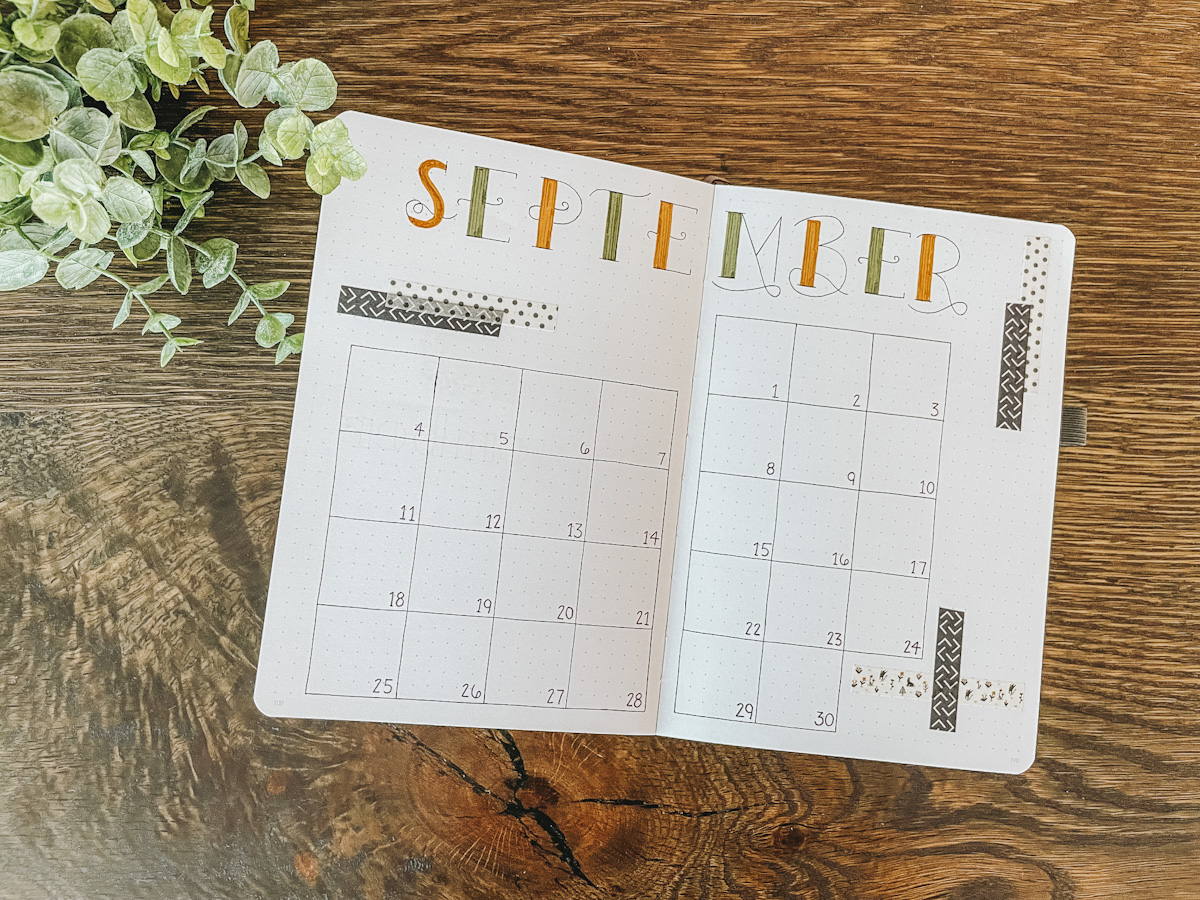
Typically, I lean more towards using a double page spread to view the whole month. It gives me more space to write things in like important dates, appointments, social media posts, birthdays, etc.
In a standard size bullet journal, I make my boxes 6×6 grid spaces. I’ve discovered this is the largest I can make them and still fit them all on the two pages. Of course, I do it in pencil first and then trace back over with my favorite Tombow brush pens.
I like to choose an overall color and design theme to use for the whole month, so for September I chose to use colors in my dual tip brush pens that make me think of fall. A dark mustard yellow, olive green and a plum purple.
If you want to bring even more color and detail into your monthly spread page, add stickers, washi tape, or design something yourself. For this month, I chose to add washi tape in neutral shades.
Single Page Bullet Journal Monthly Spread

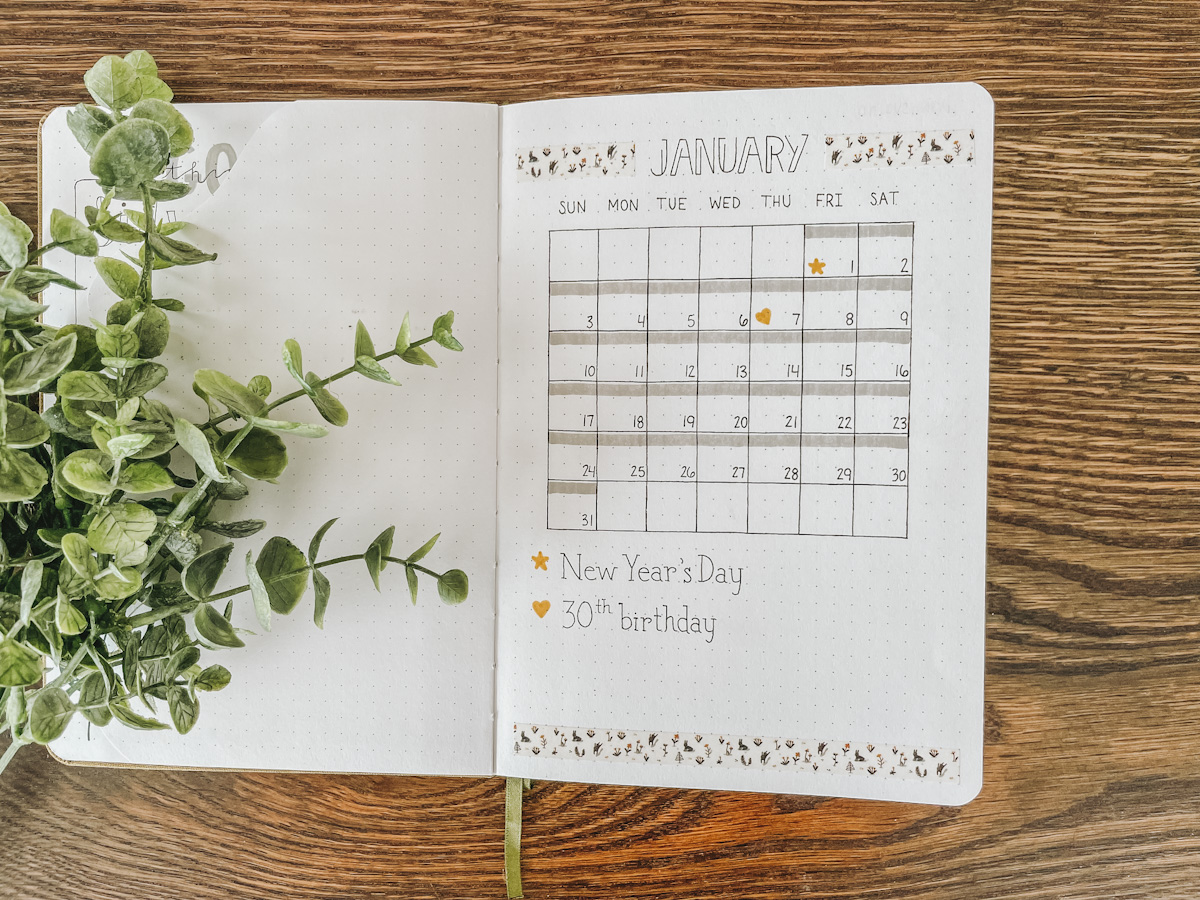
You can also do your bullet journal monthly spread on just one page. This is a great option if you don’t need as much space to write events and appointments down. I used washi tape to add a little decoration to the page, and a pop of color with mustard. Other than that, this monthly spread is super simple!
When you do your monthly spread on just one page, that also leaves the whole page to the next of it empty. Here are some ideas for ways to use that extra page:
- Write down a Bible verse in fun, big letters that you want to memorize that month.
- Going on a trip? Use the empty page to write down your packing list.
- Meal plan for the whole month in one place.
- Use it as a habit tracker. Write down things you are wanting to do every day and check off boxes as you complete them. It helps to have all of your goals in one place.
If you are here and wanting to create your own planner, I hope seeing these monthly spreads is boosting your confidence that you can do this! It’s a whole lot of squares and rectangles. Everything else is just bonus. You don’t have to spend hours drawing in your journal to make it pretty. Find a sticker book you love and go to town decorating.
I would love to know. How many years have you been using a bullet journal? Are you a newbie or a veteran? Let me know in the COMMENTS.
Check Out More Posts Like This:
- Bullet Journal Supplies
- How to Start a Bullet Journal
- Homeschool Planner for Moms
- Make a Bullet Journal Weekly Spread
- Bullet Journal Fonts
PIN IT FOR LATER


Leave a Reply