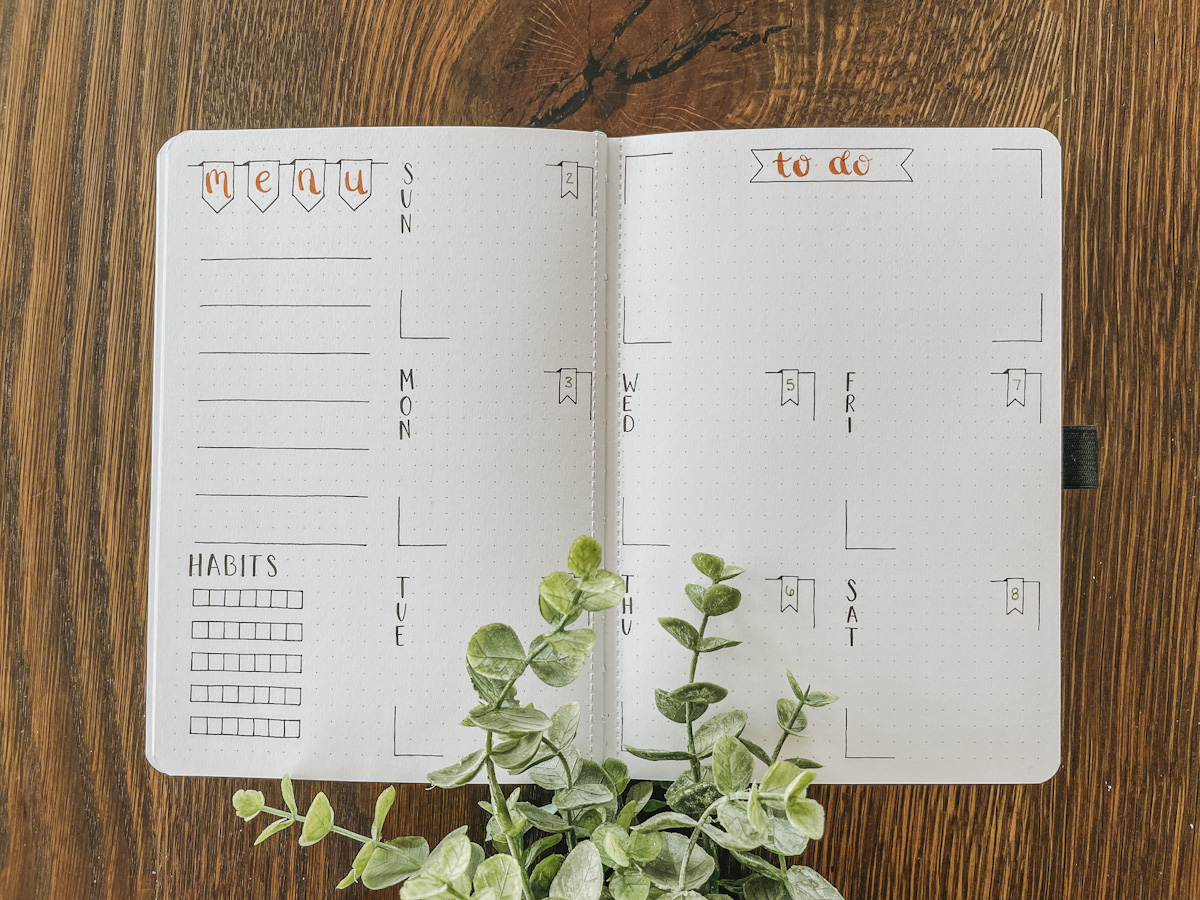
Check out these basic bullet journal banners with step-by-step tutorials. A fun way to add style and function to your bullet journal pages.

Dot grid notebooks are such a fun way to jump into the world of creativity and journaling. But so many people freeze up when they see that dot grid notebooks come completely blank! Well, you are in the right place. I am here to show you simple bullet journal banner ideas. These small details and basic shapes are a great way to boost the appeal of your bullet journal spreads.
Before you begin, if you are a total newbie, you might be wondering what is bullet journaling? A bullet journal is a blank notebook, but instead of straight lines to write on, you have dots evenly spaced. These dots give you the freedom to create your own bullet journal spreads that work for your specific needs. Whether you are using it as your typical journal, planner, commonplace book, habit tracker, menu planner, or all of the above and more! There is no wrong way to use your bullet journal.
Check out these posts if you are just getting started and need more help and ideas:
- Favorite supplies – simple tools to help you get started
- How to start – a guide for going from empty spaces to beautiful bujo pages
- Homeschool planner page ideas
- Creating monthly spreads
- Creating weekly spreads
- Hand lettering ideas
When to Use Bullet Journal Banners
Bullet journal banners can be used in many different ways to add that pop of extra decoration. Use them to bring attention to a new section on your bullet journal pages, or to highlight important information. Different banners on the same page create levels of organization.
Here are just some of the ways to use bullet journal banners:
- Bullet journal headings
- Title page
- Quote pages
- Days of the week and dates
- To-do lists
- Menu heading
Step-by-Step Banner Tutorials
Now that you have all of your favorite supplies gathered, you are ready to sit down and begin. Follow these simple step-by-step instructions to add your favorite simple banners to your bullet journal pages.
Basic Bullet Journal Banners
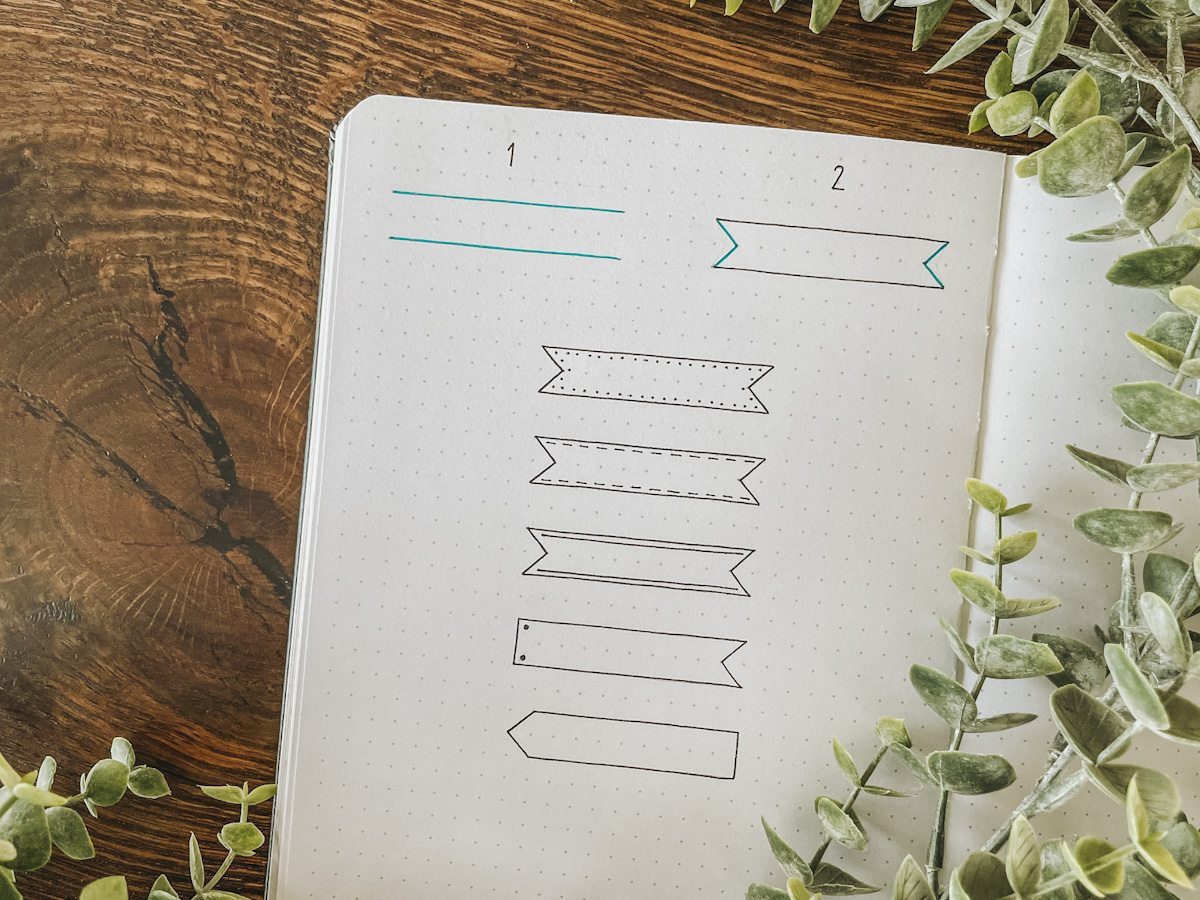
This basic banner is so simple, but also really versatile when you alter just small details. To start it off, (step 1) draw a horizontal line the length that you need for your word/s to fit in correctly. Next, add another horizontal line parallel to the first (I typically skip a row of dots and do the line on the next row). Finally, (step 2) on both sides draw small lines to form a “V” that connect the two horizontal lines. This “V” can be as shallow or as deep as you want. And there you have the most basic banner done!

Now, you can change the design of this simple little banner by making slight changes to it. You can add a dotted or dashed line pattern along the inside, draw it in color instead of black, make one side of the banner a straight line instead of a “V”, change the “V” on one end of the banner to an arrow shape, turn the banner top to bottom, etc. There are so many different ways to change this very basic banner while still keeping it simple.
Single Fold Banner
A single fold banner is one that looks like it has a fold on one side of it. It is still a relatively simple bullet journal banner to draw but adds more dimension to your page.
The first step is to draw a rectangle shape. Tip: Try writing your heading in pencil first so you know how long you need to draw the rectangle. Next, choose whether you want the fold of your banner to be on the left or the right side. (step 2) Draw a line coming out of the side that you chose, and then add another horizontal line parallel to the first, but extending slightly under the rectangle. You want the distance between these two parallel lines to be the same distance apart as the rectangle.

Then, (step 3) draw a vertical line to attach the lowest line to the rectangle, and draw small lines to form a “V” to connect the two horizontal lines. The final step (step 4) is to create the look of the single fold banner by drawing a diagonal line from the corner of the small banner up to the corner of the rectangle, and then you can either color this triangle shape in fully or draw diagonal lines to fill it in. This creates the effect of a fold in the banner.
Once you get the hang of drawing a single fold banner, you can easily change the sides, corners and number of folds that you have to create more fancy headers for your bullet journal pages.
Ribbon Banners
Ribbon banners are a fun way to break up letters when you have a short header. Ex. to-do list or menu heading. You can even use a single ribbon to label the day of the week or date on your bullet journal calendar pages.

The first step is to draw a horizontal line from one dot to the next dot, then skip 1-2 dots depending on how wide you want your banner, then draw another horizontal line from one dot to the next dot. Do this until you have as many blank spaces between the lines as letters in your header.
Next, (step 2) draw a horizontal line in the blank spaces, but a little bit above the original lines you drew. (step 3) On both ends of the lines you just drew in the blank spaces, draw vertical lines down 2-3 rows of dots. From both ends of these vertical lines, (step 4) draw a diagonal line to meet in the middle like a “V”. Finally, to create some dimension, (step 5) add a small triangle shape from the top left corner of each banner down to the horizontal line next to it, and shade it in fully.
Check out the variations to these ribbon banners too! Make them skinnier, invert the “V” shape, or turn it into a triangle. I love that just taking the time to change the basic shapes can alter the whole look of your bullet journal spreads.
Washi Tape Bullet Journal Banners
It is always a really great idea to keep a small supply of washi tape around for use in your dot grid notebooks. They come in so many different colors, patterns, and floral themes that help you create the page you envision easily. The main thing to note if you plan to use washi tape for your bullet journal banners is that it needs to be lighter colors. That way when you write on top of it you can see the words well. The colors will look darker when the tape is still rolled up, so just peel it up a little bit to see whether it will work or not.

You can do several basic shapes using the washi tape. Some ideas include to do a rough tear, cut both sides straight with scissors, cut a diagonal line on both sides, cut a “V” shape on both sides, or leave one side a straight line and the opposite side a “V” shape. Once you choose the washi tape that you want to use, peel and tear, or cut, the amount you need off. Stick it down where you need your simple bullet journal banner, and then do hand lettering over the top to write your bullet journal headers.
This post contains affiliate links, which means I make a small commission at no extra cost to you. See my full disclosure HERE.
Bullet Journal Banners Time Saving Hack
If you find yourself short on time every once in a while, consider using a banner stencil. By purchasing a stencil sheet, you get a variety of basic banner options at your fingertips. Then, on the off chance you need to quickly finish your bullet journal spreads for the month, the banner stencil saves you some time and stress.
Here are a couple fun options that also serve as a bookmark:
Let me know in the COMMENTS if you are new to bullet journaling or a seasoned pro. I would love to know and answer any questions you have!
PIN IT FOR LATER


Leave a Reply